 |
| The set-up for making an alginate mold. |
 |
| Alginate is a powdery blue material made from seaweed. |

 |
| For our class purposes, we are using a 1:2 ratio of alginate to water. Translated into numbers, that is 67 oz of alginate and 100 oz. of water. |
 |
| Water goes into the bowl first, then the powdered alginate gets added next. |
 |
| Mix by hand or use the LOWEST setting on the blender... |
 |
| ...the lowest setting on the blender will keep air bubbles to a minimum... |
 |
| Have someone hold the container as you pour in the alginate. |

 |
| Have your "hand model" practice their hand position BEFORE they immerse their hand into the alginate. |
 |
| We put a large coffe can underneath Robert's right arm so he could comfortably lean against it and keep his hand from moving around too much in the alginate. |

 |
| The alginate should take between 5 and 15 minutes to set depending on how cold the water is - the cooler the water the longer it takes to set. "Set" alginate will have the texture of jello or cooked egg whites. |
 |
| Once the alginate sets, have your model take his/her time gently releasing their hand from the mold. IMPORTANT: be gentle! Go slow! The alginate is VERY delicate and you can ruin the mold if you move too fast! |
 |
| Amazing detail in alginate. |
 |
| I insert a long stick in between the edge of the alginate and the plastic "mother mold" to break the vacuum seal holding the alginate in the mother mold. |

 |
| Tip everything over sideways so gravity will work with you in removing the alginate mold from the mother mold. |
 |
| Have someone ready to catch the alginate as it emerges from the mother mold. |


 |
| I gently slice the alginate open... I cut down each side (each alginate hand mold will be slightly different), cutting 2/3rds of the way down on each side, leaving the alginate connected at the bottom |


 |
| Gently spreading open the mold to expose the fingers. |
 |
| We will use an expanding foam product from Fred Meyers called "MAX FILL"to cast the hand. Everyone working with this product should be wearing goggles, gloves and work clothes because it is NOT water soluble... if it does accidentally get on your clothes, just leave it alone and let it harden & dry - then it will pop right off! |
 |
| Brooke holds the alginate mold in place so nothing breaks. |


 |
| I use a q-tip to measure the depth of the fingers, then mark the position with a sharpie... |
 |
| ...then I transfer this measurement to my plastic hose... Not so essential when the fingers are straight in the mold, but VERY HELPFUL if the fingers are curved back upward! |

 |
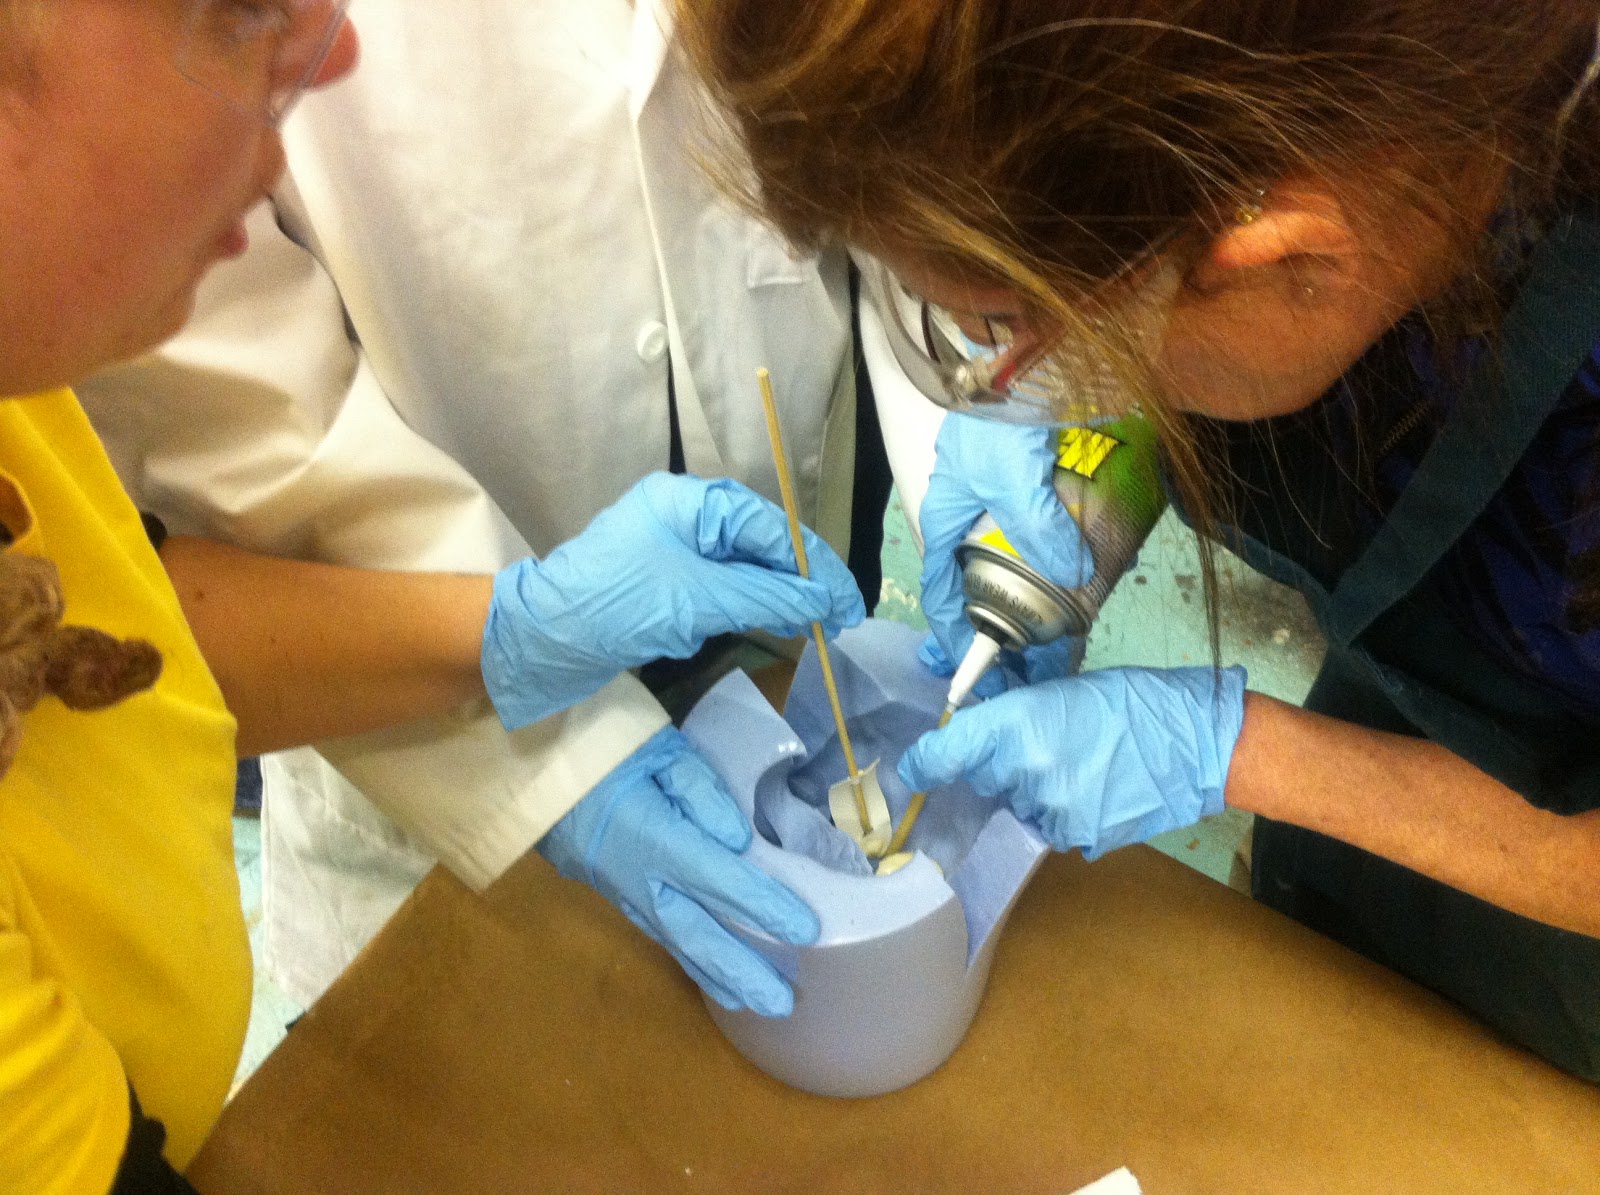
| I've prepared little "separators" in advance of this demo - stiff paperboard and bamboo skewers. |
 |
| Shake the can well for 30 seconds then do a test run. Use as light a touch as possible. |
 |
| Coral holds the separator in between the fingers in the alginate so I can fill the fingers one at a time, insuring that there is foam going all the way down to the fingertips. |

 |
| Filling all the fingers. |
 |
| After the fingers and thumb have been filled, put the mold back together and fill it up the rest of the way. |
 |
| ...then gently put the alginate mold back into the plastic mother mold. |

 |
| Sideways works well because you want to be gentle and go easy with it. |


 |
| You can use the stick again to get the alginate back into the mother mold. |

 |
| Then, top it off with more foam. |

 |
| One-piece Plaster Mold Demo begins with a plasticene (non-drying, oil-clay) model on a well urethaned bottom board. |
 |
| I've washed the surface of the bottom board three times with a sponge and a product called "Green Soap." (See below) |
 |
| Issi makes sure I'm doing it right. |


 |
| I show everyone my jello mold and talk about the importance of "well-drafted" surfaces in both models and molds. |
 |
| A bottle of "Green Soap." Ask a pharmacist if he/she can order some for you. They'll be surprised that anyone under 70 knows what this is, let alone wants to use it. |
 |
| We use Green Soap in moldmaking as a release agent with plaster. |
 |
| Have a bucket or a box, lined with a plastic trash bag, standing nearby in case something goes wrong with your plaster and you need to abort the process. You can then just throw away the plaster in the trash bag...it's easier than removing set plaster from your mixing container |

 |
| We use the "Island Method" of mixing our Pottery Plaster. One container of water... |
 |
| I use a metal sifter to mix my plaster into the water - this will break up any plaster chunks. |
 |
| This is actually a time-lapse photo... it takes awhile to get it to this phase; where an "island" of plaster is formed in the center of the mixing bowl. Take your time, make sure the water can't absorb any more plaster. |

 |
| Once you put your hand into the plaster and begin mixing, you're committed to the process... the plaster begins to set from this moment. The speed of the set is affected by such variables as the temperature of the water, air humidity, the temperature of your shop and the age of your plaster. |

 |
| This first bit onto the model is called the "impression layer." The plaster has the consistency of thick milk at this point and gets into every nook and crevice of your model. This is good! This ensures excellent detail in your plaster mold. |


 |
| Next time I will build up a "retaining wall" with water clay around the perimeter of my plasticene model. This would have kept the "liquidus" plaster in place and kept it from sloshing all over my bottom board. |
 |
| Slosh slosh slosh.... |


 |
| As the plaster begins to set, it starts to hold its own shape. I can still scoop it up and use it to build onto the surface of the mold. |


 |
| Smoothing the outside of the mold. |
 |
| While the plaster is still malleable, make a "plateau," or flat spot, on top. When you flip the mold over later on to remove the plasticene model, this plateau will allow the plaster mold to sit evenly on the table without rocking. |


 |
| Later on that night: I release the foam hand from the alginate mold. Insert your stick between the alginate and the plastic mother mold to release the alginate from the mother mold. |


 |
| Gently open the alginate mold. Go easy so as not to break the foam fingers. |


 |
| Beautiful! Robert's foam hand emerges with all of its digits perfectly formed! |


No comments:
Post a Comment